baby changing station manufacturers design products for different levels of traffic, cleaning frequency, wall construction, and accessibility requirements. For facility managers, architects, retailers, restaurants, schools, hospitals, and public venue operators, choosing a safe commercial baby changing station is not simply a matter of selecting the lowest price. The station must support a child safely, withstand repeated use, remain hygienic, fit the installation location, and comply with applicable building and accessibility requirements.
This guide explains how to evaluate a commercial baby changing station, what specifications to compare, which tools are needed for installation, and which purchasing and installation mistakes should be avoided. Modun provides commercial restroom solutions that help buyers assess safety, durability, hygiene, and long-term maintenance in one purchasing process.
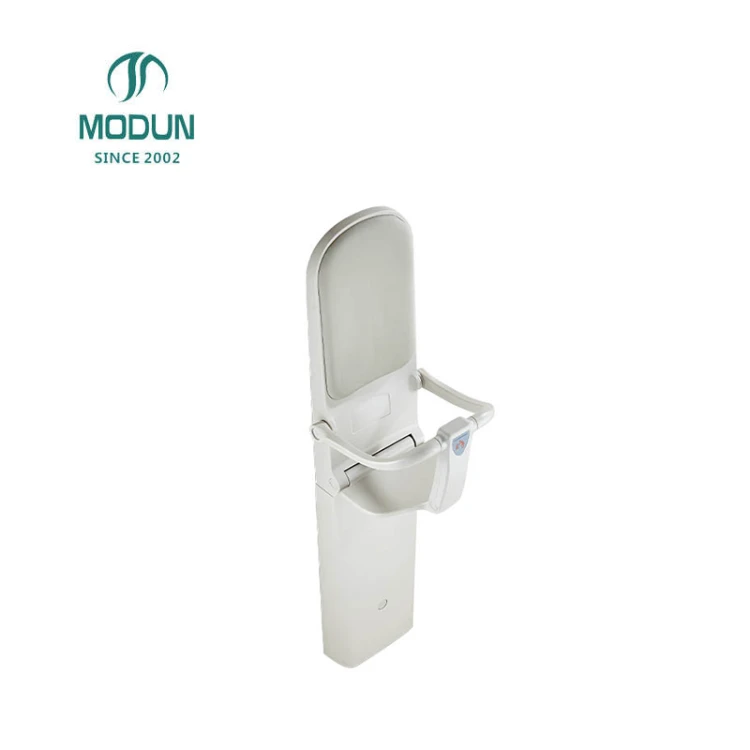
Start by identifying the risks and requirements of the installation site
First step: Identify who will use the changing station
Begin by defining the expected users and the environment. A station installed in a low-traffic office restroom may experience very different conditions from one installed in an airport, shopping center, stadium, hospital, or restaurant.
- Consider whether the station will be used by parents, caregivers, staff, or the general public.
- Estimate the number of daily users and peak traffic periods.
- Determine whether the restroom is used by infants, toddlers, or both.
- Consider whether users may carry bags, strollers, or other items while opening the station.
- Identify whether the station will be used in a unisex restroom, women's restroom, men's restroom, family restroom, or accessible restroom.
Second step: Inspect the wall and surrounding space
A safe changing station depends on a secure wall connection and sufficient clearance. Before comparing products, inspect the installation surface and measure the available area.
- Identify whether the wall is concrete, brick, solid wood, metal framing, or drywall.
- Locate studs, blocking, pipes, electrical wiring, and ventilation ducts.
- Measure the wall width, mounting height, door swing, and available approach space.
- Check whether the station could obstruct sinks, toilets, hand dryers, waste bins, or emergency equipment.
- Confirm that the changing surface can open fully without striking another fixture.
- Measure the route from the delivery entrance to the installation area.
Third step: Confirm applicable regulations and project specifications
Commercial changing stations may be subject to local building codes, accessibility rules, product standards, and project specifications. Requirements vary by country, state, city, and building type, so the buyer should confirm the applicable rules with the project architect, authority having jurisdiction, or qualified installer.
Check the following areas before ordering:
- Accessibility and reach-range requirements.
- Required clear floor space and wheelchair approach space.
- Mounting height and maximum projection from the wall.
- Load capacity and safety restraint requirements.
- Fire, sanitation, and public health requirements.
- Required product testing, labeling, or documentation.
- Local requirements for restroom fixtures in public buildings.
Do not assume that a product is compliant only because a supplier describes it as commercial grade. Ask for the exact test reports, installation instructions, load information, and compliance documentation relevant to the project location.
Compare the safety features before comparing the price
Choose a stable and properly supported changing surface
The changing surface should remain stable when opened and loaded. It should not twist, sag, shift away from the wall, or close unexpectedly during use.
Review these product details:
- Published static load capacity.
- Recommended maximum child weight.
- Wall mounting points and reinforcement requirements.
- Strength of the hinge, support arm, or gas spring system.
- Resistance to lateral movement and downward deflection.
- Whether the support system is concealed, protected, and easy to inspect.
- Whether the product includes a clear installation template.
Inspect the safety strap and restraint system
A safety strap should help keep a child positioned on the surface, but it should not replace active adult supervision. The strap should be easy for an adult to operate with one hand and difficult for a child to release accidentally.
Look for:
- A strong, adjustable, and replaceable strap.
- A buckle that closes securely and releases smoothly.
- Materials that tolerate repeated cleaning.
- Edges that do not pinch skin or clothing.
- A design that keeps the strap away from the child's neck and face.
- Clear instructions stating that the child must remain supervised.
Check for pinch points, sharp edges, and unexpected movement
Open and close a sample unit if possible. Pay attention to areas where fingers could be trapped between the wall, lid, hinge, support arm, or changing surface.
- Run a hand around exposed edges and corners.
- Check that the front edge is rounded or safely finished.
- Confirm that the lid does not slam shut.
- Test whether the surface remains open during normal use.
- Inspect hinge covers and support-arm guards.
- Look for exposed fasteners, burrs, cracked plastic, or loose trim.
Do not rely on a changing pad to compensate for an unsafe structure
A soft pad improves comfort and helps protect the child from a hard surface, but it cannot correct an inadequate mounting system, low load rating, unstable hinge, or poor wall connection. Evaluate the complete station as a structural product rather than judging only the appearance of the pad.
Choose materials that withstand commercial cleaning and repeated use
Compare the main material options
Commercial baby changing stations are commonly manufactured with high-impact plastic, stainless steel, powder-coated metal, or combinations of these materials. Each option has different maintenance and durability characteristics.
- High-impact plastic: Often lightweight, corrosion resistant, and easy to clean. Confirm its resistance to cracking, discoloration, and repeated impact.
- Stainless steel: Provides a durable and professional finish. Check the stainless steel grade, surface finish, weld quality, and resistance to cleaning chemicals.
- Powder-coated metal: Can provide a strong enclosure and color options. Inspect the coating for chipping, corrosion protection, and ease of touch-up.
- Composite construction: May combine strength and design flexibility. Confirm the structure, internal reinforcement, and long-term resistance to moisture.
Evaluate the surface for hygiene and cleaning efficiency
The best commercial station is easy to clean between users. Complex shapes, open seams, absorbent pads, and difficult-to-reach hinges can increase maintenance time and create areas where dirt and biological contaminants accumulate.
Prioritize the following features:
- Nonporous surfaces.
- Rounded corners and sealed edges.
- Minimal seams and recessed dirt traps.
- Removable or replaceable pads.
- Water and chemical resistance appropriate for the facility cleaning program.
- Compatibility with the disinfectants used by the cleaning team.
- Accessible hinges and hardware for inspection.
Confirm the correct cleaning procedure
Ask the manufacturer for written care instructions before purchase. A surface can be damaged by harsh chemicals, abrasive pads, high heat, or incorrect dilution ratios.
The cleaning procedure should specify:
- Which detergent or disinfectant can be used.
- Which chemicals should be avoided.
- Whether the changing pad can be removed and replaced.
- How to clean the strap and buckle.
- How to inspect the hinge and mounting hardware.
- How to report cracks, loose fasteners, or damaged components.
Check dimensions, accessibility, and user comfort
Measure the closed and open dimensions
Product dimensions should be reviewed in both the closed and open positions. A station may fit the wall when closed but obstruct a walkway or fixture when open.
Record the following measurements:
- Overall width.
- Overall height.
- Closed projection from the wall.
- Open projection from the wall.
- Required installation height.
- Distance between mounting points.
- Weight of the complete unit.
- Clearance required for cleaning and maintenance.
Assess accessibility for caregivers
A commercial changing station should allow caregivers to approach, open, use, and clean it without unnecessary barriers. The exact requirements depend on the applicable accessibility rules, but the design should generally support safe reach and maneuvering.
Consider:
- Whether the station can be reached from a wheelchair.
- Whether the opening handle can be operated without excessive force.
- Whether the open surface is at a suitable height for the intended users.
- Whether a caregiver has enough space to stand or position a wheelchair.
- Whether the open station blocks the accessible route.
- Whether instructions and warning labels are easy to see.
- Whether the station is available in an appropriate restroom location.
Look for practical design features
Useful design features can improve the user experience and reduce maintenance complaints, but they should not compromise structural safety.
- Integrated hooks for small bags, if permitted by the project design.
- Built-in liner or paper dispenser compatibility.
- Clear surfaces that allow staff to inspect the unit.
- Replaceable straps and pads.
- Product labels that explain safe use.
- Hardware that can be serviced without removing the entire unit.
- Neutral finishes that match other restroom fixtures.
Use a step-by-step process to select the right commercial model
Step 1: Create a site requirement sheet
Write down the requirements before contacting baby changing station manufacturers or distributors. This prevents the purchasing team from choosing a product based only on photographs or a short price comparison.
- Installation location.
- Wall construction.
- Expected daily traffic.
- Required dimensions.
- Required load capacity.
- Applicable accessibility and safety requirements.
- Preferred material and finish.
- Cleaning chemicals used at the facility.
- Required delivery date.
- Warranty and replacement-part expectations.
Step 2: Shortlist suitable suppliers
Compare suppliers that provide complete technical information rather than only marketing descriptions. A reliable supplier should be able to explain the product structure, mounting method, maintenance requirements, and available replacement parts.
Request:
- Technical data sheet.
- Installation manual.
- Dimensional drawings.
- Load and safety information.
- Material specifications.
- Cleaning and maintenance instructions.
- Warranty terms.
- Replacement-part availability.
- Compliance and test documentation.
- References for similar commercial installations.
Step 3: Compare the products using the same criteria
Create a comparison table so that every supplier is evaluated on the same basis.
- Safety and load capacity.
- Mounting requirements.
- Material durability.
- Hygiene and cleanability.
- Dimensions and accessibility.
- Ease of operation.
- Replacement parts.
- Warranty coverage.
- Lead time and shipping method.
- Total installed cost.
Step 4: Inspect a sample or request installation photographs
If a physical sample is unavailable, ask for detailed photographs of the hinge, support system, strap, mounting plate, fasteners, interior surfaces, and wall connection. Product images should show the station open and closed.
Where possible, test:
- Opening and closing force.
- Stability of the open surface.
- Strap adjustment and buckle operation.
- Ease of cleaning around hinges and corners.
- Visibility of safety labels.
- Replacement of the pad or strap.
Step 5: Calculate the total cost of ownership
The purchase price is only one part of the cost. A less expensive unit may require more frequent replacement, longer cleaning time, special hardware, or difficult repairs.
Include:
- Product price.
- Freight and packaging.
- Wall reinforcement.
- Professional installation.
- Cleaning supplies and labor.
- Replacement pads and straps.
- Warranty service.
- Expected service life.
- Downtime during repairs.
Step 6: Approve the product and installation details in writing
Before placing the order, confirm the exact model, finish, dimensions, mounting kit, accessories, documentation, delivery date, and warranty. Written confirmation reduces disputes between the buyer, supplier, contractor, and facility owner.
Prepare the required tools and install the station correctly
Required tools and materials
The exact tools depend on the wall type and product instructions. The following list covers common commercial installation requirements.
- Manufacturer installation manual and mounting template.
- Measuring tape.
- Level.
- Pencil or removable marker.
- Stud finder or wall scanner.
- Drill and suitable drill bits.
- Hammer drill and masonry bits for concrete or brick.
- Socket set or wrenches.
- Screwdrivers.
- Torque wrench when specified by the manufacturer.
- Appropriate anchors, bolts, washers, and backing plates.
- Personal protective equipment.
- Dust protection and cleaning materials.
- Temporary support or a second installer for heavy units.
Step 1: Verify the wall structure before drilling
Confirm that the selected wall can carry the station and the expected user load. Drywall alone is usually not an adequate structural surface for a heavily used commercial unit unless the installation includes suitable reinforcement.
- Locate studs or structural blocking.
- Check the wall for pipes, cables, and concealed services.
- Confirm the anchor type specified for the wall material.
- Install or verify backing reinforcement where required.
- Ask a qualified professional to review uncertain wall conditions.
Step 2: Mark the mounting position
- Use the approved dimensions and mounting template.
- Mark the centerline and all mounting holes.
- Check the height from the finished floor, not the unfinished floor.
- Measure the open projection and confirm that it will not obstruct circulation.
- Use a level to verify that the marks are horizontal.
Step 3: Install the anchors and mounting hardware
- Drill holes using the correct diameter and depth.
- Remove dust and debris from the holes.
- Install anchors or fasteners appropriate for the wall structure.
- Attach the mounting plate or rear housing.
- Tighten fasteners evenly and to the specified torque.
- Do not substitute ordinary screws for the required commercial mounting hardware.
Step 4: Attach and align the changing station
- Lift the unit into position with adequate assistance.
- Secure the unit to the installed mounting points.
- Check that the housing is level and flush against the wall.
- Open and close the station several times.
- Confirm that the support system engages correctly.
- Check for movement, rattling, uneven gaps, or loose hardware.
Step 5: Test the completed installation
Do not place the station into service immediately after tightening the last fastener. Complete a documented inspection.
- Apply a controlled test load according to the manufacturer instructions.
- Check the wall connection and fasteners for movement.
- Confirm that the changing surface remains stable.
- Test the strap and buckle.
- Inspect all edges and pinch points.
- Confirm that the unit does not obstruct doors, routes, or other fixtures.
- Clean the station before opening the restroom to the public.
- Record the installation date, model number, and installer.
Avoid the most common purchasing and installation mistakes
Mistake 1: Choosing based only on the lowest price
A low purchase price may hide additional costs for reinforcement, replacement parts, difficult cleaning, or early failure. Compare the complete installed cost and expected maintenance requirements.
Mistake 2: Assuming every wall can support the station
Mounting a heavy commercial station directly to weak drywall can lead to loosening, wall damage, or product failure. Confirm the wall structure and use the mounting method specified for that surface.
Mistake 3: Ignoring the open projection
Buyers sometimes measure only the closed unit. An open station can block a restroom door, narrow an accessible route, or interfere with another fixture. Always plan the complete operating envelope.
Mistake 4: Selecting a product that is difficult to sanitize
Deep seams, absorbent pads, exposed fasteners, and complicated hinges increase cleaning time. Request cleaning instructions and inspect the areas that staff must disinfect after every service cycle.
Mistake 5: Treating the safety strap as optional
The strap is an important part of the safety system. Do not remove it, disable it, or replace it with a non-approved component. Replace damaged straps promptly and continue to supervise the child at all times.
Mistake 6: Failing to confirm replacement parts
Pads, straps, buckles, hinges, and labels may eventually need replacement. Confirm that these parts can be ordered individually and ask how long they will remain available.
Mistake 7: Installing without a final inspection
A station can look secure while still having loose anchors, incorrect alignment, or insufficient wall reinforcement. Complete a documented inspection before public use and repeat inspections as part of routine facility maintenance.
Build a maintenance and inspection program after installation
Perform routine visual inspections
Facility staff should inspect the station at a frequency appropriate for traffic and risk. High-use locations may require daily checks, while lower-use locations may use a scheduled weekly inspection.
- Look for cracks, deformation, sharp edges, or discoloration.
- Check that the station remains firmly attached to the wall.
- Inspect hinges, support arms, and mounting covers.
- Test the strap and buckle.
- Check the pad for tears, separation, or excessive wear.
- Confirm that safety instructions remain readable.
- Remove the station from service if a structural or restraint defect is found.
Clean the station after use and at scheduled intervals
Follow the manufacturer's cleaning instructions and the facility's infection-control procedures. Use the correct dilution, contact time, and wiping method for the selected disinfectant.
- Remove visible soil using the approved cleaner.
- Disinfect the changing surface, strap, buckle, handles, and surrounding areas.
- Pay attention to seams, corners, and hinge covers.
- Allow the product to remain wet for the required contact time.
- Dry the station when required by the care instructions.
- Record recurring damage or cleaning problems for management review.
Replace damaged components instead of improvising repairs
Do not use tape, general-purpose adhesive, non-approved straps, or improvised fasteners to repair a safety-critical component. Contact the supplier or manufacturer for the correct replacement part and installation procedure.
Use a final buyer checklist before placing the order
Safety checklist
- Is the load capacity clearly documented?
- Is the wall mounting method appropriate for the installation surface?
- Does the unit include a secure and replaceable safety strap?
- Are pinch points and sharp edges controlled?
- Does the open surface remain stable?
- Are safety warnings visible and understandable?
Hygiene and durability checklist
- Are the surfaces nonporous and easy to disinfect?
- Can the pad and restraint components be replaced?
- Is the product compatible with the facility's cleaning chemicals?
- Are hinges and seams accessible for inspection?
- Is the material suitable for the expected traffic and moisture level?
Project and service checklist
- Do the closed and open dimensions fit the restroom?
- Does the installation support accessibility requirements?
- Are technical drawings and installation instructions available?
- Are replacement parts available?
- Is the warranty clearly stated?
- Can the supplier provide relevant compliance documents?
- Are lead time, shipping, and installation responsibilities confirmed?
The safest choice is a commercial baby changing station that matches the wall structure, traffic level, cleaning program, accessibility requirements, and long-term maintenance plan. By comparing safety construction, material quality, dimensions, documentation, service support, and total cost of ownership, purchasing teams can avoid the most common failures associated with public restroom fixtures.
When evaluating baby changing station manufacturers, buyers should request complete technical information rather than relying on product appearance alone. Modun can help commercial projects review practical restroom requirements and select a suitable changing station solution for safe, hygienic, and reliable public use.


